فروشگاه ناوک - آموزش و نرم افزار گرافیکی انیمیشن طراحی و معماری
ارزانترین فروشگاه ارائه دهنده محصولات گرافیکی ، آموزشی ، نرم افزار و معماریفروشگاه ناوک - آموزش و نرم افزار گرافیکی انیمیشن طراحی و معماری
ارزانترین فروشگاه ارائه دهنده محصولات گرافیکی ، آموزشی ، نرم افزار و معماریStuart Christensen – Maya Tutorials 61-71 شماره ۱۷۴۲
پیش از در پست شماره ۱۶۰۲ با سری اول آموزشهای حرفه ای Stuart Christensen یعنی شماره های اول تا ۶۰ در مایا آشنا شدید . در این پست نیز شما را با آموزشهای شماره ۶۱ تا ۷۱ آشنا می کنیم که در حدود ۵ ساعت تدریس و یکی از حرفه ای ترین آموزشهای مایا ۲۰۱۱ و در نوع خود بی نظیر محسوب میشود .
قیمت دی وی دی : 1000 تومان
( محصول شماره ۱۷۴۲ )
Infinite skills - Learning Maya 2012 شماره 1737
آموزش چگونگی افزایش مهارت در مایا 2012 در یکی از حرفه ای ترین آموزشهای مایا تحت عنوان آموزش مهارتهای نا محدود مایا 2012 که شامل بیش از 10 ساعت آموزش مفید و جامع این نرم افزار قدرتمند می باشد . این آموزش بهمراه کلیه فایلهای تمرینی ارائه شده است که به سادگی و با دقت و بصورت لذتبخشی توسط یک معلم حرفه ای طراحی شده است .
قیمت دی وی دی : 1200 تومان
( محصول شماره 1737 )
Digital Tutors - Creative Development Enhanced IK Animal Rigging
Digital Tutors - Creative Development Enhanced IK Animal Rigging with Farley Chery
بیش از ۱۰ ساعت آموزش ریگینگ یک شیر کوهستان با استفاده از تکنیک IK در مایا 2012
در این مجموعه آموزشی آقای Farley Chery با ایجاد کنترلی دقیق بر روی یکی از سخت ترین تکنیکهای ریگینگ یعنی IK در یک شیر کوهستان و چهارپایان با آناتومی مشابه شما را با این تکنیک هیجان انگیز آشنا می کنند . این ویدئوی آموزشی از 52 قسمت تشکیل شده است که بیش از 10 ساعت آموزش مفید را در بر می گیرد . دیدن این مجموعه بسیار کاربردی را به شما توصیه می کنیم . لیست این 52 قسمت آموزشی عبارتست از :
52 videos in this course
1. Introduction and overview
2. Taking a look at our enhanced IK setup in the hind legs
3. Comparing FK systems
4. Beginning the no flip knee
5. Creating our measure tool
6. No flip knee hierarchy for auto swivel hips
7. Finishing the knee and pole vector hiearchies
8. Finishing the no flip knee and understanding the PV buffer
9. Exporting out our mechanism
10. Theory adding FK controls
11. Creating and export the right Pole Vector
12. Creating a squash and stretch spine
13. The nSpine
14. Troubleshooting and looking at other options for spinal controls
15. Troubleshooting and looking at other options for spinal controls (part 2)
16. Spine revision using components instead of cluster for control
17. Adding in spinal rotations
18. Finishing the rotation controls and adding a kill switch
19. Completing the spine tool and prepping for the tail
20. Completing the tail setup
21. We begin our automatic hip orientation rig
22. Finishing up the automatic hip setup
23. Introduction to our model
24. Inserting the Spine and Tail
25. Editing the inserted setups
26. Anatomy of a cat and joint placement
27. Completing joint placement
28. Inserting our no flip knees and automatic hip tools
29. Adding rear IK handles and controlling stretch
30. Cleaning up the tail and prepping for the creation of the neck
31. Review of the neck and creation controls
32. Review of the skinned model
33. Enhancing the useful output from our Ik handles
34. Adding toe movements and troubleshooting
35. Adding in knee compensation for foot swivel
36. Wrapping up the hind paw
37. Beginning the foreleg controls
38. Building a pose space tool to automate the scapula
39. Finishing the automatic scapula and adding our controller
40. Adding rotational elements to our controller
41. Adding enhanced IK controls for the foreleg
42. Looking at the buffer group and discussing other rigging options
43. Wrapping up the neck controls
44. Implementing our motion flow hips
45. Setting up the chest controls
46. Setting up the COM and COG
47. Implementing the no flip pole vector into our foreleg
48. Parenting the head
49. Quick cleanup of the rig
50. Finishing up the tail
51. Tips to improve the rig
52. Final rig tests
قیمت دی وی دی : 1200 تومان
( محصول شماره 1731 )

Jamal Bradley - Acting Shot Walkthrough 2011 شماره 1713
آموزش تحت عنوان از طراحی تا تهذیب نام یک فیلم آموزشی بینهایت زیبا و کاربردی است که در سه قسمت تمامی روشها از فاز طراحی و ایفای نقش تا فاز نهایی یعنی مکالمه و دیالوگ را در نرم افزار مایا به شما یاد می دهد . آقای Jamaal Bradley یک انیماتور حرفه ای است که با استفاده از منابع ، آنالیز دیالوگ ، تجزیه و تحلیل ژست های کاراکتر فرآیند ساخت یک انیمیشن زیبا را به شما یاد می دهد . دیدن این آموزش را به همه انیماتورهای عزیز توصیه می کنیم .
قیمت دی وی دی : 1000 تومان
( محصول شماره 1713 )
Eat3D – Live Action & CG 3 – A Comprehensive Guide to Compositin
Eat3D – Live Action & CG 3 – A Comprehensive Guide to Compositing FULL
در این آموزش بسیار جالب راهنمای کامل ترکیب فیلم با انمیشن را در مایا و Composite فراخواهید گرفت . بهترین قسمت این آموزش بکارگیری برنامه Composite درکنار مایا2011 برای ساخت و ترکیب یک سفینه بزرگ غول آسا می باشد . در نهایت نیز آقای Matt Skonicki از صحنه ایجاد شده یک تصویر HDRI در فتوشاپ تهیه می نماید . در واقع این آموزش ترکیبی است از آموزش چند برنامه همچون مایا 2011 و Composite و After Effect و SynthEyes و فتوشاپ که ساخت یک صحنه بسیار هیجان انگیز شبیه فیلمهای تخیلی را به شما بخوبی آموزش می دهد .
قیمت دی وی دی : 1000 تومان
( محصول شماره 1711 )
Digital Tutors - Utilizing Shading Neworks in Maya 2011 ش 1701
در این سی دی آموزشی با تعداد زیادی از تکنیکهای Shading Network در مایا 2011 آشنا می شوید . Shading Network در بسیاری از کار همچون ساخت متریالها و تکستچرها ، نورپردازی ، افکتهای ویژه و ریگینگ کاربرد دارد .
قیمت سی دی : 500 تومان
( محصول شماره 1701 )

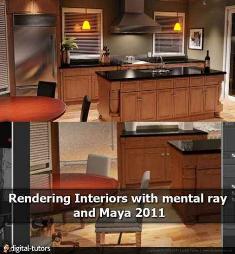
Digital Tutors - Rendering Interiors with mental ray & Maya 2011
در این مجموعه آموزشی شما را با تکنیکهای واقع گرایانه نورپردازی داخلی در مایا 2011 آشنا کرده و توسط موتور رندر Mental Ray آنرا رندر می کنیم .
The ability to realistically light an interior environment is a skill that is highly sought after in the CG industry. It is a skill that is used very heavily in areas such as feature films, games, and architectural visualizations. This course will explore the entire, step-by-step process of lighting your scenes. We will start by learning how to make sure that our lights are behaving in a way that is physically accurate by utilizing real-world light data in our scenes. From there, we will learn how to incorporate realistic secondary illumination into our scenes, learn how to create physically-accurate materials in Maya, and explore many techniques and workflows designed to help you overcome many of the common issues that you are likely to encounter in your own scenes.
19 videos in this course
1. Introduction and project overview
2. The importance of scene scale in rendering
3. Preparing scene for initial rendering
4. Utilizing IES light profiles in mental ray
5. Adding secondary illumination to our scene
6. Using lens shaders to improve lighting results
7. Gamma-correcting materials and textures in Maya
8. Assigning materials to the walls and ceiling
9. Creating materials for the kitchen cabinets
10. Creating a material for the kitchen table
11. Adding realistic color temperature to lights
12. Adding additional light sources to our kitchen scene
13. Adding a final light source into our kitchen scene
14. Building a brushed metal material in Maya
15. Fixing common reflection and refraction errors in Maya
16. Improving glossy reflection quality in mental ray
17. Adding visible illumination sources to our scene
18. Enhancing shadows and indirect illumination in our scene
19. Making final quality adjustments to our render
قیمت : قیمت کلیه محصولات را می توانید در فایل اکسل ( قابل دانلود ) ملاحظه نمائید
( محصول شماره ۱۶۹۹ )
Digital Tutors - Pixar RenderMan Tutorials شماره ۱۶۹۷
در این سی دی آموزشی Siggraph شما را موتور رندر Pixar Renderman و نحوه انیمیشن سازی و رندر کردن با آن را بخوبی به شما نشان می دهد .
قیمت : قیمت کلیه محصولات را می توانید در فایل اکسل ( قابل دانلود ) ملاحظه نمائید
( محصول شماره 1697 )

FXPHD mya211 Maya lighting and rendering شماره 1694
آموزش حرفه ای تکنیکهای نورپردازی و رندرینگ در نرم افزار مایا توسط شرکت نام آشنای Fxphd
هدف از این مجموعه تفهیم بیشتر نورپردازی و تکستچرینگ دیجیتال در مایا بوده که با استفاده از Vray و Pixar Renderman در محیط مایا انجام می شود . نه تنها ابزارهای مرتبط را به شما معرفی می کند بلکه نحوه استفاده دقیق از آنها را نیز به شما یاد می دهد .
قیمت : قیمت کلیه محصولات را می توانید در فایل اکسل ( قابل دانلود ) ملاحظه نمائید
( محصول شماره 1694 )
Autodesk at GDC 2011 شماره ۱۶۹۳
یک مجموعه بسیار جالب از شرکت قول پیکر Autodesk که شامل سه مجموعه آموزشی جالب در خصوص مدلسازی انیمیشن سازی و ایجاد رابط کاربری بین نرم افزارهای مختلف همچون Maya 3dsmax softimage motionbuilder mubox می باشد یعنی برای خلق یک سر کاراکتر از تمامی این نرم افزار بطور جالبی استفاده می کند این مجموعه بسیار جالب را به شما توصیه می کنیم بخصوص بخاطر آموزشهایی که استادان برتر شرکت Autodesk ارائه می دهند در حد کاملا حرفه ای بوده و دیدن آن خالی از لطفا نیست . این سه آموزش شامل :
Creating QT interfaces for Maya and MotionBuilder
Next-Gen 3D Head Creation: Modeling, rigging and animation in Autodesk Entertainment Creation Suite
Cross-platform Animation Pipeline Interactive Studios at Behaviour
قیمت : قیمت کلیه محصولات را می توانید در فایل اکسل ( قابل دانلود ) ملاحظه نمائید
( محصول شماره 1693 )

نحوه خرید از فروشگاه و دریافت لیست آخرین بروز رسانی
ادامه مطلب ...