فروشگاه ناوک - آموزش و نرم افزار گرافیکی انیمیشن طراحی و معماری
ارزانترین فروشگاه ارائه دهنده محصولات گرافیکی ، آموزشی ، نرم افزار و معماری
فروشگاه ناوک - آموزش و نرم افزار گرافیکی انیمیشن طراحی و معماری
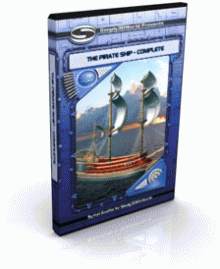
ارزانترین فروشگاه ارائه دهنده محصولات گرافیکی ، آموزشی ، نرم افزار و معماریSimplyMaya - The Pirate Ship شماره ۱۳۸۸
آموزش ساخت یک کشتی بادبانی بزرگ بسیار زیبا در مایا توسط شرکت SimplyMaya
بیش از 15 ساعت آموزش مولتی مدیا
You will start off the pirate ship project by creating Image planes to use as reference to achieve the basic shape and size of our ship using nurbs primitives and nurbs curves. Once we have our ship blocked out we will begin converting into polygons to start adding details to the wood on the side of the ship. We�ll be using a variety of tools and techniques such as split polygon tool, 'move vertices' as well as 'convert to Subdivisions'to have a bit more control over shaping the geometry. We will also do more nurbs curve work to create ropes that hang down from the sails. After are ship model is complete the tutorial switches to preparing the model for texturing.
We will then enter the world of UV layouts and will be using a few different options to achieve this called such as automatic map'and planar map', as well as learn how to effectively move any UVs that are overlapped using the tools in the UV editor to obtain a flat map. Once our UV's are finished and we've taken a UV snap shot we then import our snapshot into a paint program and learn how to color and hand paint the ships'surface.
Areas covered in the paint section are using layers, staining of the surfaces, as well as use of a few filters. Once we have our colors complete its off to create our bump and secular maps which creates depth to surface flaws such as cracks and adds a more realistic look.
قیمت : قیمت کلیه محصولات را می توانید در فایل اکسل ( قابل دانلود ) ملاحظه نمائید
( محصول شماره ۱۳۸۸ )
SimplyMaya - Introduction to Organic Modeling in Ma شماره ۱۳۸۷
آموزش طراحی اندام و اعضای بدن و اسکلت موجودی خیالی در محیط مایا از شرکت Simply Maya .
3 ساعت و 15 دقیقه آموزش مالتی مدیا
This is a short organic modeling project and it's great for someone who's new to creating organic characters as it gives you a general overview of the techniques without being too demanding. Starting on a highly detailed models if you have never worked with organic sculpting in Maya can be a bit discouraging as it takes a long time to get a great end result and that's why modeling the skeleton man above would be a good place to start for new users in this field.
You'll learn how to create a project and set up geometry based image planes in the first part of this tutorial, and then move on to the working with all of Maya's three geometry types NURBS, Polygons and Sub D's to build an organic character. During this process NURBS primitives are used to create the initial organic shape and you'll get some practice at working with CV's and isoparms. We then convert to polygons and combinedifferent parts of the model into one continuous mesh before we start to sculpt out the details on our character using the split poly tool, move vertices and extrude to create the lip area, eye socket, ears and add muscle definition. Some of the detail work is done between parts but you'll be shownall the techniques so you can decide how much work you want to put into your own character. We also switch between polygons and sub d's to work onboth a high and low resoulution mesh and use box modeling techniques to build the hands and feet.
With the character complete we create his clothes and accessories using both polygons and NURBS and you'll see how to insert edges and create folds and bends on the clothing for a more realistic look.
قیمت : قیمت کلیه محصولات را می توانید در فایل اکسل ( قابل دانلود ) ملاحظه نمائید
( محصول شماره ۱۳۸۷ )

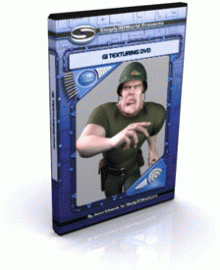
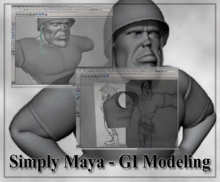
SimplyMaya - GI ReMastered ( Modeling - Texturing شماره 1386
آموزش ساخت یک سرباز ارتش کارتونی با جزئیات کامل با در قالب دو آموزش مدلینگ و تکستچرینگ .
بیش از 21 ساعت آموزش چندرسانه ای مالتی مدیا!!
GI character modeling tutorial. The model is created from Poly's and then later converted to Subdivion Surfaces for fine tuning of the mesh. The tutorial also covers the use of the infamous mjpoly tools script for the creation of edge loops for the facial structure in minimal time and Mayas own Split Poly tool.
The Texturing will cover the creation of custom brushes and seamless tileable textures in Photoshop followed by how to create a uv layout for a polygonal and subdivison surface character model in Maya. After these first few chapters, create realistic skin textures using a combination of hi resolution photographs and airbrushing, again within Photoshop using layers, then back into Maya to fine tune the textures using IPR (Interactive Photo realistic Rendering).
Includes all the texture and scene files
قیمت : قیمت کلیه محصولات را می توانید در فایل اکسل ( قابل دانلود ) ملاحظه نمائید
( محصول شماره ۱۳۸۶ )
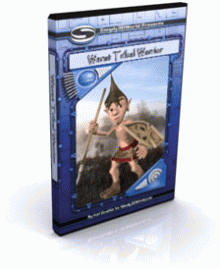
SimplyMaya - Warat Tribal Warrior شماره 1385
آموزش مدلینگ و ساخت یک شخصیت بومی قبیله ای کارتونی در محیط مایا از شرکت Simply Maya .
5 ساعت و 15 دقیقه آموزش مالتی مدیا
learn all the steps needed to make an organic game character from start to finish. We will begin our project in the modeling section by setting up image planes of the front and side views. You'll learn how to use these to create the basic shapes and proportions using both nurbs and polygons. We will then manipulate the character to create a clean and efficient model that has fewer than 3500 polygons.
After the modeling is complete we will begin the texturing process by learning how to make a clean UV map using several different methods of laying out UV's. These include such tools as cut, sew and move UV's. After taking a UV snapshot, you will be shown how to import it into PhotoShop and learn the techniques needed to hand paint textures using layers, brushes and filters. In addition, you'll see how to make a specular map for your model.
قیمت : قیمت کلیه محصولات را می توانید در فایل اکسل ( قابل دانلود ) ملاحظه نمائید
( محصول شماره 1385 )
SimplyMaya - Creating a Boxing Animation in Maya شماره 1384
آموزش متحرک سازی یک شخصیت در حال وارد نمودن ضربات بوکس به اشیاء در مایا از شرکت Simply Maya .
2 ساعت و 50 دقیقه آموزش مالتی مدیا
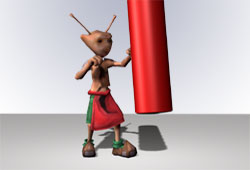
This project is aimed at users who have some knowledge in the field of animation already as we'll create a complete animation of the low poly man throwing repeated punches at a boxing ball. During this process you will learn how to key frame more involved motions over a longer period of time working with the time slider. We'll create motions where the body will rotate and twist depending on the action the character is performing so you'll learn how to coordinate movement in an animation.
Once the main frames for our boxing animation has been keyed we will start to edit and refine it in the Graph Editor to get smooth and realistic movement. We'll also use the Dope Sheet to offset the rotation in the spine and arms of the low poly character before rendering out our final animation sequence.
If you are new to animation we recommend that you watch our tutorial Character Posing & Ball Throw Animation before you move on to this project.
قیمت : قیمت کلیه محصولات را می توانید در فایل اکسل ( قابل دانلود ) ملاحظه نمائید
( محصول شماره 1384 )

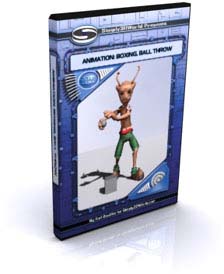
SimplyMaya - Character Posing & Ball Throw Animation شماره1383
آموزش متحرک سازی یک شخصیت در حال پرتاب توپ در مایا از شرکت Simply Maya .
2 ساعت و 7 دقیقه آموزش مالتی مدیا
The ball pick up and throw is intended to help break new Maya users into the world of keyframe animation. You will learn how to set up your character in a starting pose then work your way through key framing individual joints to start making the model move in the desired way. Once you have the animation blocked in by keyframing you will then learn how to start editing keys using other tools like the graph editor and dope sheet to loose up your character motions even more. This tutorial is great for anyone interested in taking their first steps in animation and its work flow.
قیمت : قیمت کلیه محصولات را می توانید در فایل اکسل ( قابل دانلود ) ملاحظه نمائید
( محصول شماره 1383 )

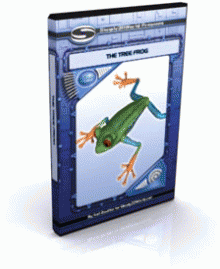
SimplyMaya - Tree Frog ( Modeling - Texturing ) شماره 1382
آموزش مدلینگ و تکسچرینگ طراحی و ساخت یک قورباغه درختی در محیط مایا .
حدود 9 ساعت آموزش مالتی مدیا
Kurt shows you how to create this tree frog from start to finish. Watch Kurt as he demonstrates how he created the tree frog for the cg networks challenge where he was a finalist.
The texturing covers all you need to know about adding this fantastic looking skin to him. You will follow on step by step from laying out the UV`s to creating the spec maps and the final render.
قیمت : قیمت کلیه محصولات را می توانید در فایل اکسل ( قابل دانلود ) ملاحظه نمائید
( محصول شماره ۱۳۸۲ )
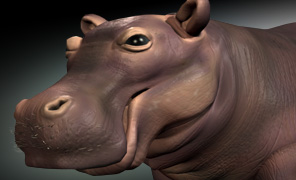
SimplyMaya - The Hippo شماره 1381
آموزش طراحی و خلق یک اسب آبی واقعی در محیط مایا .
حدود 8 ساعت آموزش جامع مالتی مدیا
If you'd like to learn how to create a realistic Hippo then this tutorial is right up your alley. We will begin our project by setting up our image planes and then start creating Nurbs primitives to block out the correct shape and proportion of the entire body. Once we have our Hippo blocked out we will refine the shapes in Nurbs and then convert them to Polygons to add geometry for more precise shaping. When the hippo has its basic geometry we will then convert to Sub-d's to really start pulling out the details. Some of the tools we will cover are split polygon, extrude edge/face and sculpt polygon.
After our model is complete we will dive into the world of texturing. We start with learning how to create a flat workable UV map. We will cover different mapping techniques like planar map and automatic mapping as well as tools like cut and sew UV's. Following our complete UV map we will import an UV snap shot into a paint program like Photoshop to learn how to hand paint our textures using a variety of options including using layers and filters to achieve a nice flesh-tone. We will also create a color map and bump map, as well as a specular map. Near the end of our project we will do a bit of paint effects on the face of our Hippo to give him some finishing touches.
قیمت : قیمت کلیه محصولات را می توانید در فایل اکسل ( قابل دانلود ) ملاحظه نمائید
( محصول شماره 1381 )
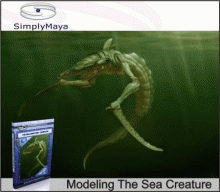
SimplyMaya - Modeling The Sea Creature شماره 1380
آموزش طراحی و خلق یک هیولای عجیب و عظیم الجثه دریایی با نام " Sea Creature " در مایا از شرکت Simply Maya .
7 ساعت آموزش جامع چندرسانه ای
Simplymaya dengan bangga menghadirkan, tutorial pemodelan dan texturing makhluk laut. Tutorial ini akan memulai dengan membuat gambar untuk membantu kami mencapai dasar bentuk dan ukuran nurbs.
Once we have our new character blocked out we will then convert our nurbs to polys so we can start editing our new poly geometry using tools like spilt polygon and extrude face/edge. After we have added a lot of edges and geometry we will then convert into sub’s to shape the details of the arms and body.
When the model is finished we will dive into the world of UV mapping where you will learn how to create and make effective flat UV’s to import into a paint program like Photoshop. Some of the tools you will learn are planar map, automatic map, and move/sew UV’s. Once the UV’s are complete we will import a UV snapshot into Photoshop where we will paint our color maps using layers and different brushes. We will also cover how to make bump, specular and transparent maps to give your character a realistic look. This tutorial series was encoded using DiVX, please ensure you have the latest divx codec on your machine. This will play fine on both a Mac and a PC
قیمت : قیمت کلیه محصولات را می توانید در فایل اکسل ( قابل دانلود ) ملاحظه نمائید
( محصول شماره ۱۳۸۰ )
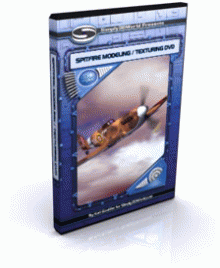
SimplyMaya - Spitfire ( Modeling - Texturing ) شماره 1379
بیش از ۱۲ ساعت آموزش ساخت مدلسازی و تکستچرینگ یک هواپیمای بمب افکن در محیط نرم افزار مایا توسط شرکت SimplyMaya
Create this great looking Spitfire in this twelve hour Modelling and Texturing tutorial from SimplyMaya.com re-released for our January sale with a 40% discount. We begin this project by setting up image planes using a side and front view of our Spitfire. Next we will create Nurbs primitives to block out the correct shape and proportion of the plane. Once the plane is blocked out we will refine the shapes in Nurbs and then convert them to Polygons to add geometry for more precise shaping. When the plane has its basic geometry we will then convert to Sub-d's to start pulling out the details. Some of the tools we will cover are split polygon, extrude edge/face and sculpt polygon.
After our model is complete we will explore the world of texturing. We start with learning how to create a flat workable UV map and then we'll cover different mapping techniques like planar map and automatic mapping as well as tools like cut and sew UV's. Following our complete UV map, we will import an UV snap shot into a paint program like Photoshop to learn how to hand paint our textures using a variety of options including using layers and filters. We will also create a colour map and bump map, as well as a specular map. Then you will set up your lighting and apply your final render.
The texturing for this tutorial starts at part 13
# Length: 12 Hours 30 Mins
# Author: Kurt Boutilier
قیمت : قیمت کلیه محصولات را می توانید در فایل اکسل ( قابل دانلود ) ملاحظه نمائید
( محصول شماره 1379 )
